Magnetic nail polish has transformed the nail art world — from mesmerizing “cat eye” streaks to luxurious “velvet” textures and even 3D holographic illusions. Behind these stunning effects is one key tool: the magnet.
As a professional magnet manufacturer, HS Magnet supplies magnets for countless industries — and yes, that includes the beauty world. In this guide, we’ll show you how the right magnet can take your nail art from ordinary to extraordinary.
1. How Magnetic Nail Art Works
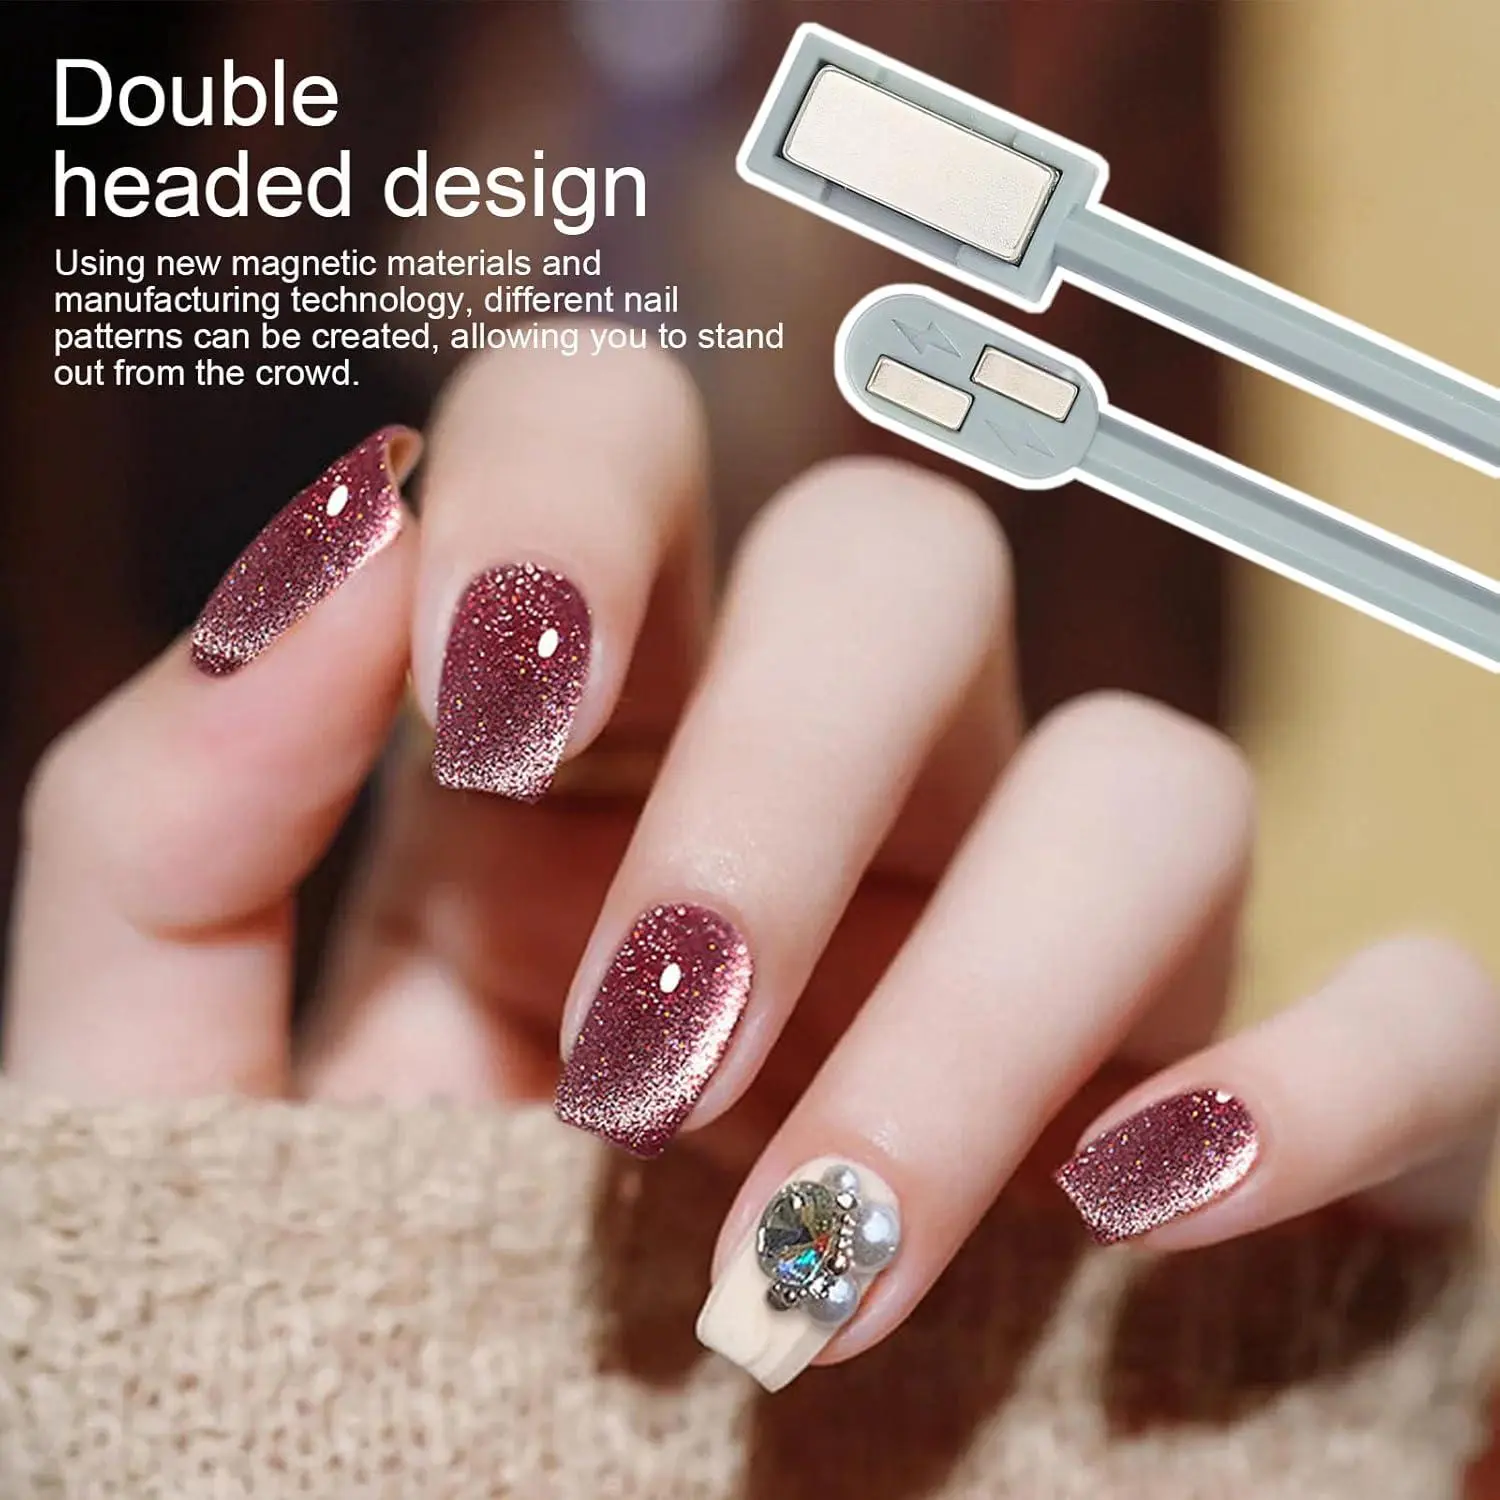
Magnetic nail polishes contain tiny metallic particles suspended in the polish. When a magnet is held close to the wet polish, these particles move and align according to the magnetic field, creating unique patterns.
Different magnets = different effects:
- Cat Eye Line: Created with a strong, linear field magnet.
- Velvet / Gradient: Achieved by moving a magnet in small circles or changing its distance.
- 3D or Starburst Patterns: Made with multipole or shaped magnets.
2. Types of Magnets for Nail Art
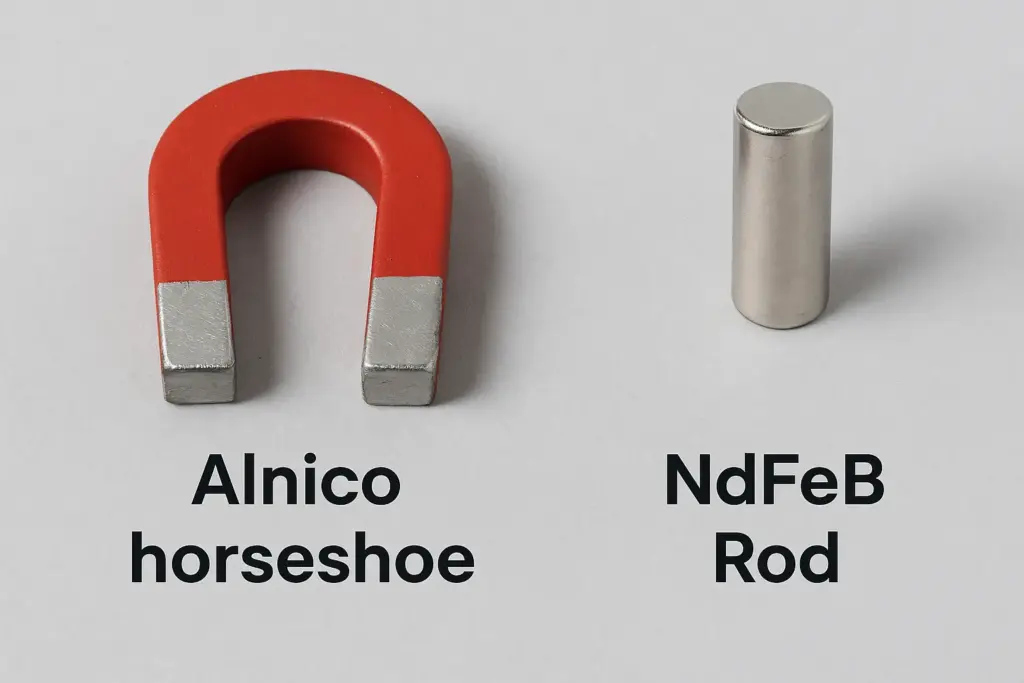
Alnico Horseshoe Magnets – Classic & Reliable
- Best for: Traditional cat-eye lines and simple linear effects.
- Advantages: High temperature resistance (perfect under UV/LED lamps), long service life, classic shape.
- Field Strength: Moderate – creates soft, elegant lines without over-pulling the metallic particles.
Neodymium (NdFeB) Magnets – Sharp & Modern
- Best for: 3D designs, high-definition patterns, and advanced salon effects.
- Advantages: Extremely high magnetic strength, fast pattern formation, variety of shapes (rod, block, sphere).
- Grades for Nail Art:
- N35–N38: For beginner kits or DIY users.
- N42–N52: For professionals who need crisp patterns in seconds.
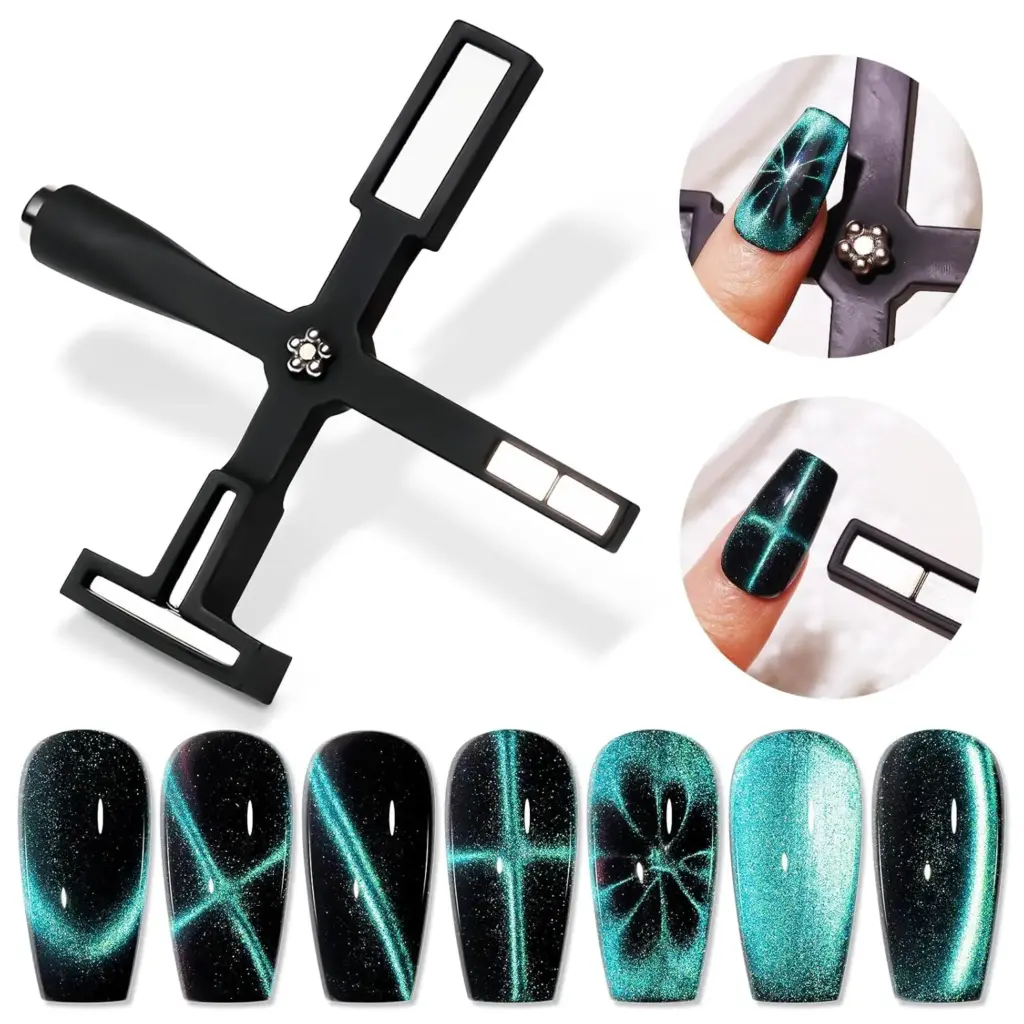
Specialty Shaped Magnets
- Round / Dome Magnets: Soft halo or spotlight effects.
- Rod Magnets: Circular wave patterns.
- Multipole Blocks: Intricate geometric lines and multiple bands in one stroke.
3. How to Use a Magnet for Nail Art (Pro Tips)
- Prep Your Nails: Apply base coat and cure.
- Apply Magnetic Polish: Work one nail at a time to keep the polish wet.
- Hold Magnet Close: About 2–3 mm from the nail for 5–15 seconds.
- Experiment with Angles: Tilting changes the depth and shape of the effect.
- Cure & Seal: Cure under UV/LED light, then apply a top coat (you can magnetize the top coat too for sharper results).
Pro Tip: Re-magnetizing the top coat before curing can sharpen edges and prevent the design from spreading.
4. Choosing the Right Magnet for Your Business
| User Type | Recommended Magnet | Why |
|---|---|---|
| Salon Professionals | N42–N52 Neodymium | Fast, sharp results, perfect for client speed. |
| DIY Nail Artists | N35–N38 Neodymium | Affordable, easy to use, good for practice. |
| Luxury Nail Brands | Custom-shaped NdFeB or Alnico | Unique patterns for branding and product differentiation. |
5. Maintenance Tips for Nail Art Magnets
- Clean with 99% isopropyl alcohol to remove polish residue.
- Store with magnetic keepers to protect field strength.
- Avoid soaking in acetone for long periods.
6. Why Work with a Professional Magnet Manufacturer?
Most nail art magnets on the market are generic. At HS Magnet, we can customize the magnetic strength, shape, coating, and size for your specific nail polish formula and desired effect.
From durable Alnico horseshoe magnets for traditional salons to high-performance N52 neodymium for modern 3D nail systems — we make magnets that perform beautifully in the nail industry.
Leave a Reply